DeepSeek: Running Locally — a 4-Step Guide (No Experience Needed)
- Category
- AI & Local LLM
- Posted
- February 11, 2025
- Updated
- September 16, 2026
- By
- Jacob Lloyd — written with AI assistance, post-project
- Read time
- 6 min read
In plain terms: A beginner-friendly, four-step guide to running the DeepSeek AI chatbot entirely on your own PC. No cloud account, no subscription, and nothing you type ever leaves your computer. If your graphics card has 8 GB of memory or more, you can follow along.
This is a simple guide to running DeepSeek locally on your own computer. You don't need any background with Large Language Models (LLMs) — if you can follow directions, you can do this. Running it locally instead of through a paid API also means you skip the token bill entirely — see what a cloud AI agent stack actually costs for a sense of what you're avoiding.
This guide uses the following software (on a Windows PC):
- Ollama — runs the model
- Docker — runs Open WebUI
- Open WebUI — the web interface you actually chat in
My hardware is a Threadripper PC with 128 GB RAM and two RTX 3090s plus an RTX 2080 Super (about 56 GB of vRAM total). You don't need that. Any PC with a graphics card and at least 8 GB of vRAM can follow along.
1. Set up the software
Set up Ollama
Install Ollama onto your system. Ollama is the backend that runs LLMs — it doesn't include a Graphical User Interface (GUI, basically the web page you interact with). That comes later.
Install via the following link:
https://ollama.com/download/windows
Once complete, test that it's working:
- Open a command prompt (type "cmd" into the search bar to open Command Prompt)
- In the command prompt, type "ollama" and press enter
- You should see a list of commands pop up — that means Ollama is working. You can close the command prompt window; Ollama runs in the background:
- If the response is "'ollama' is not recognized as an internal or external command, operable program or batch file" then your installation has failed. Try again.
C:\Users\you>ollama
Usage:
  ollama [flags]
  ollama [command]

Available Commands:
  serve       Start ollama
  run         Run a model
  pull        Pull a model from a registry
  list        List models
  ps          List running models
  rm          Remove a model
  ...
This step is done when: you can open Ollama from your command prompt
Set up Docker
If you don't already have Docker, set it up from the following directions (no modifications needed, run as is):
https://docs.docker.com/desktop/setup/install/windows-install
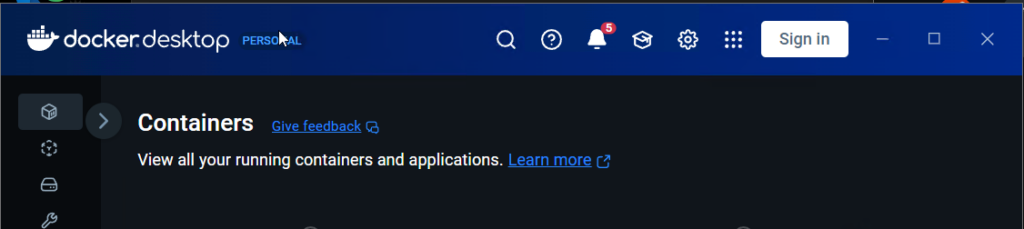
This step is done when: you can open Docker on your computer:
Set up Open WebUI
Open WebUI is just an interface that lets you talk to Ollama. There are multiple interfaces out there; this is the one I use.
Follow the directions from the quick start site:
https://docs.openwebui.com/getting-started/quick-start
- At the time of this writing, all that was needed was to run the following (note: this is because I have an Nvidia GPU):
docker pull ghcr.io/open-webui/open-webui:maindocker run -d -p 3000:8080 --gpus all -v open-webui:/app/backend/data --name open-webui ghcr.io/open-webui/open-webui:cuda- This second command only works for people with Nvidia GPUs (CUDA is Nvidia-only)
- Other directions are available at the link above
Once complete, you should see a new container in your Docker program:
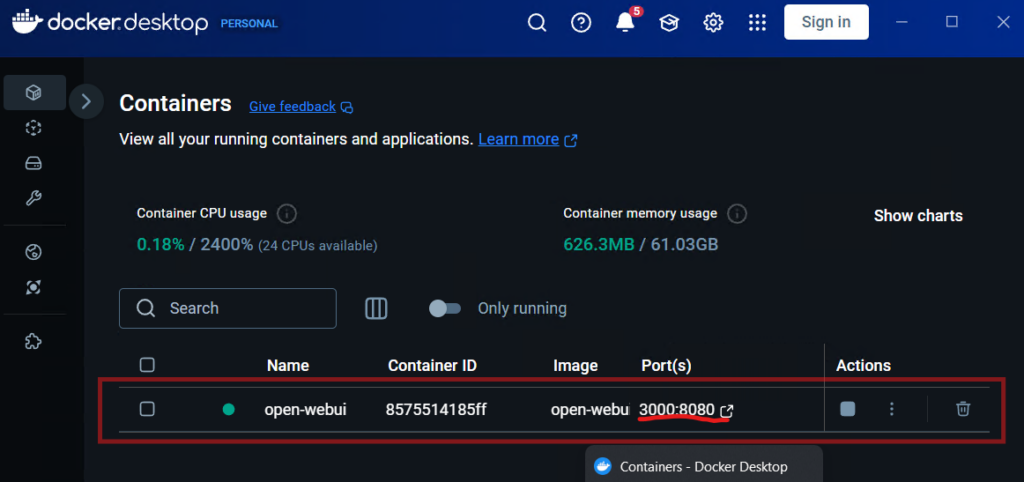
Click on the Port to launch the web user interface.
- Once it comes up, create a login
- This is running locally, so it's just how you authenticate yourself on your own machine. It does not create an online account.
- Here's the documentation from Open WebUI on creating an account: Link
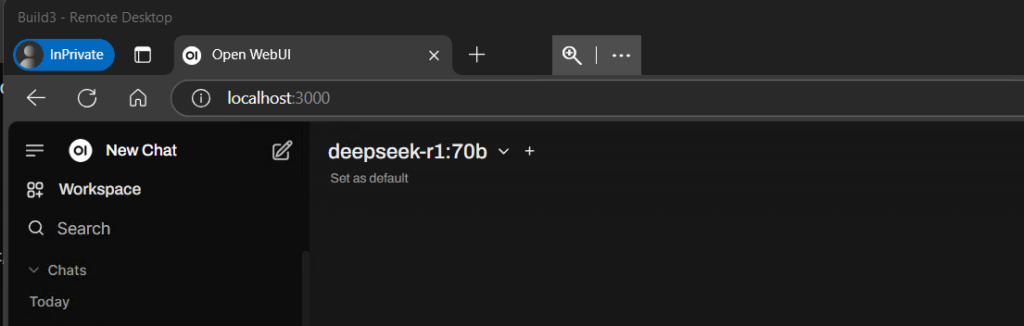
This step is done when: you can open the GUI (by clicking on the "Port(s)" in the Docker container) and have gotten into Open WebUI
Note: you should not have a model loaded yet
2. Pick which version of DeepSeek to download
There are different versions of DeepSeek (and every other LLM). The two knobs are Parameters (more is better) and Quantization (higher is better) — but in the end you're limited by whatever fits on your graphics card (your vRAM).
Basics on Parameters and Quantization
Parameters are the model's size — 7 billion, 14 billion, 32 billion, and so on. Uncompressed, each billion parameters takes about 1 GB of vRAM, so an 8 GB card can run roughly a 7B model at full quantization. File size scales the same way: a 7B model is around 7 GB, a 40B model around 40 GB. Bigger is also smarter — a 7B model can seem dumb where the 40B version of the same model can seem almost human.
Quantization is compression, measured in bits — typically 16, 8, 6, or 4. Fewer bits means a smaller file with some loss of quality: at 16-bit, 1B parameters is about 1 GB of model; at 4-bit, about 0.6 GB. As a rule of thumb, 16/8/6-bit keeps the model smart at full size; 5- or 4-bit is good enough, medium-sized, and fast; 2- or 3-bit is very small but may not stay coherent. If you want more detail, here's an excellent visual guide to quantization.
Fortunately, Ollama makes this part easy. Its ready-to-download models all sit at what I'd call a good level of compression while still keeping their coherence.
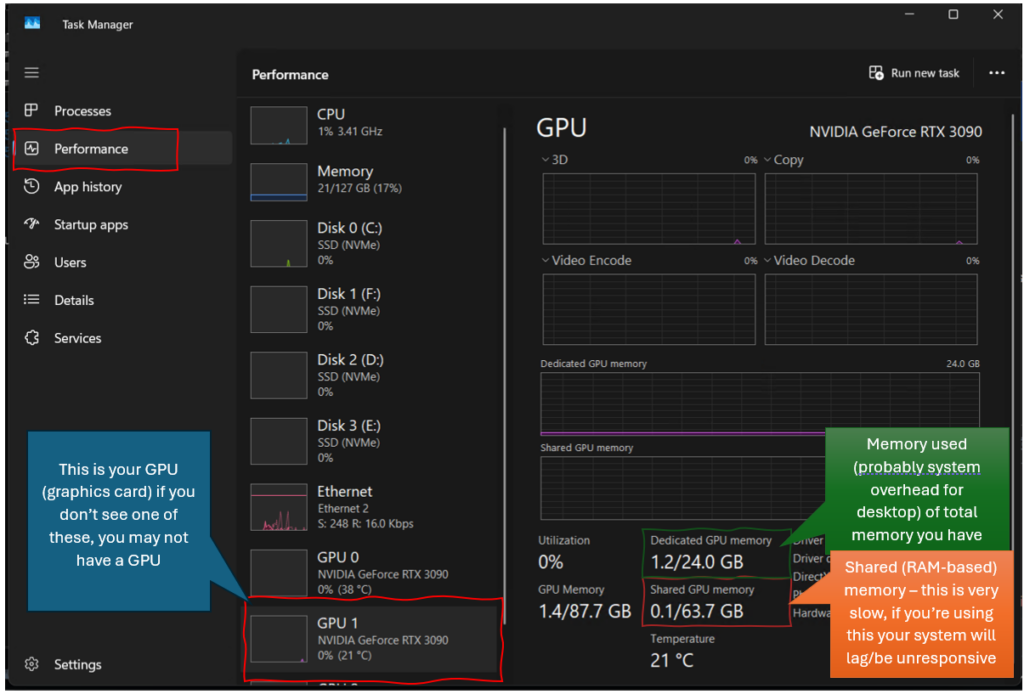
First: you need to know how much vRAM your computer has (how much RAM is on your graphics card)
How to determine how much vRAM your computer has
On Windows, press Ctrl + Shift + Esc to open Task Manager, click Performance, then click your GPU. Your vRAM is the Dedicated GPU Memory figure — the total is what you have, and your available vRAM is that total minus what's currently in use. So if total = 24 GB and used = 1.2 GB, you have about 22.8 GB available. If you have multiple video cards (like me), add their vRAM together to get your total.
Second: find the version of DeepSeek that fits in your vRAM
Ollama's models are ready for download:
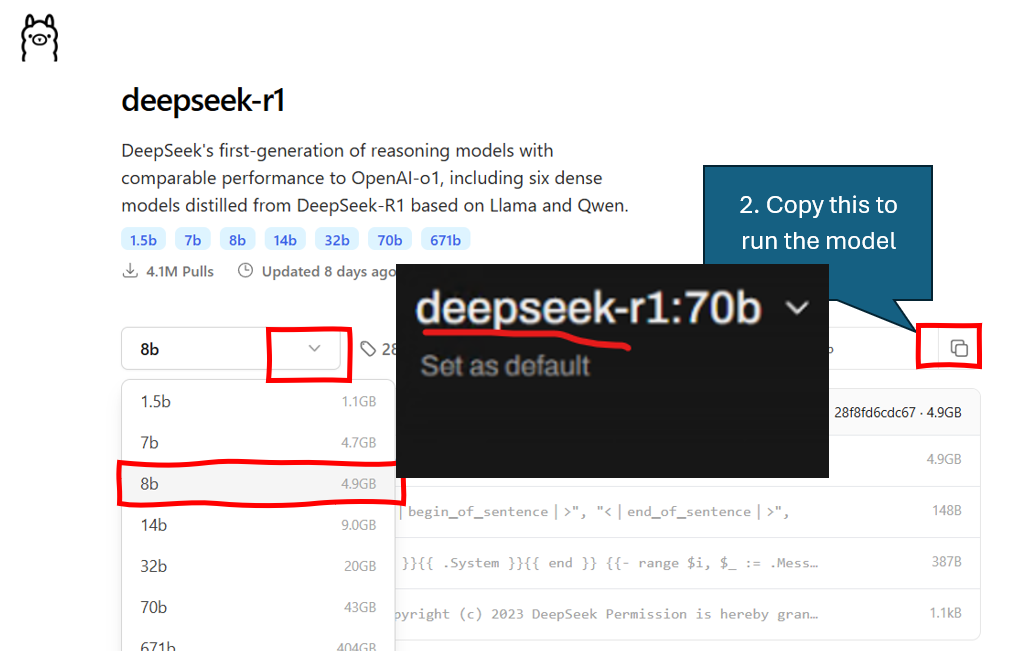
- Go to the Ollama model page for DeepSeek
- Click the dropdown to select a model version that will fit in your vRAM
- Note: I typically make sure the model takes up no more than 70% of my available vRAM.
- Example: you have an RTX 4060 with 8 GB of vRAM, your system uses 1 GB of that, so your free vRAM is about 7 GB. The models that fit under that would be the 7B or 8B versions.
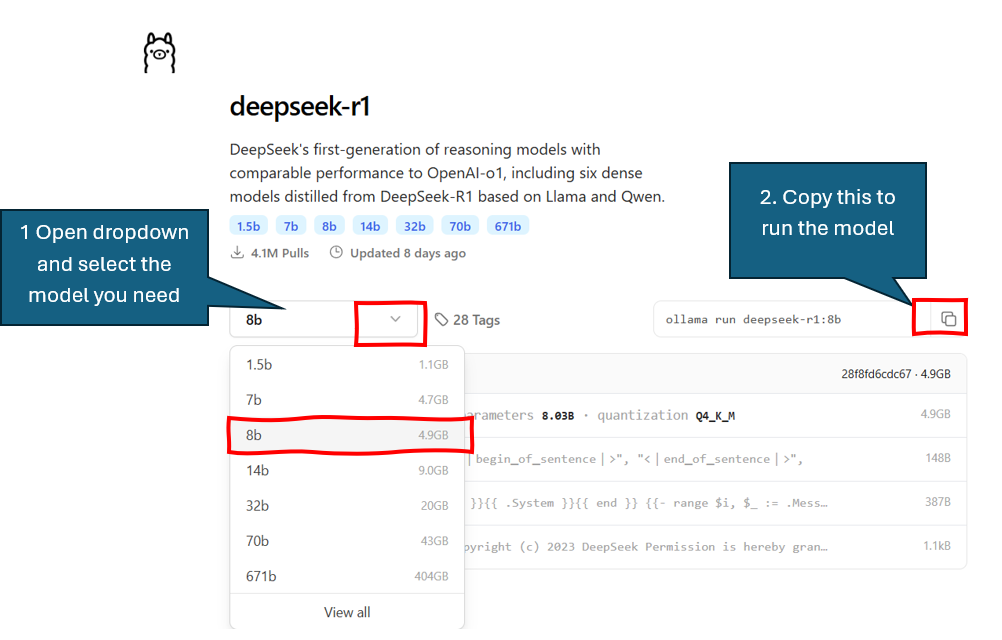
Once selected, click the "Copy" button to copy the run command.
3. Download DeepSeek
Open the Command Prompt (type "CMD" into the search bar and the Command Prompt should show up; click on "Command Prompt" to open).
Paste in the run command (the text you copied from Ollama's site for the model you want), then press "enter". It'll look something like this:
C:\Users\you>ollama run deepseek-r1:8b
pulling manifest
pulling 96c415656d37... 100% ▕████████████▏ 4.9 GB
verifying sha256 digest
success
Ollama will download the model and start it.
Once the model is downloaded you can close the command prompt.
4. Use DeepSeek
Open your Open WebUI, via Docker Desktop.
Note: you may need to refresh the webpage (GUI) to get DeepSeek to show up. If it still won't, stop your Docker container (via the Stop button next to the port in Docker Desktop) and restart it — after stopping, the button turns into a "Play" button; click that, then click the web address to load.
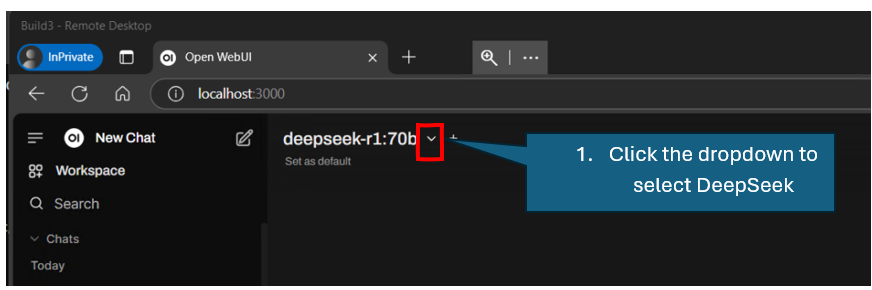
Once you're in Open WebUI, use the dropdown to select DeepSeek.
Victory
DeepSeek is now running on your computer, entirely locally.
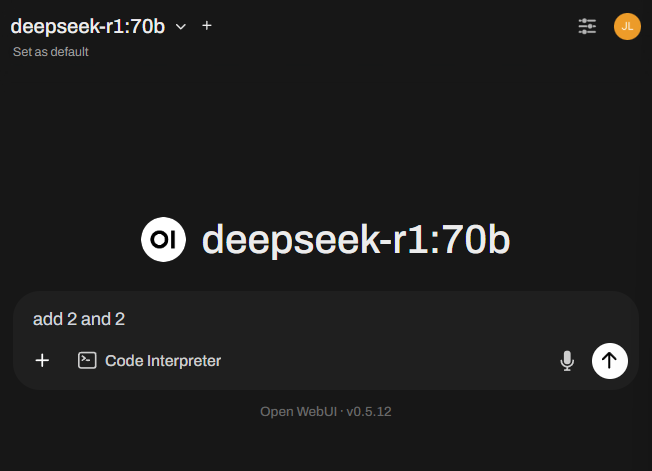
The DeepSeek model will "think" before responding.
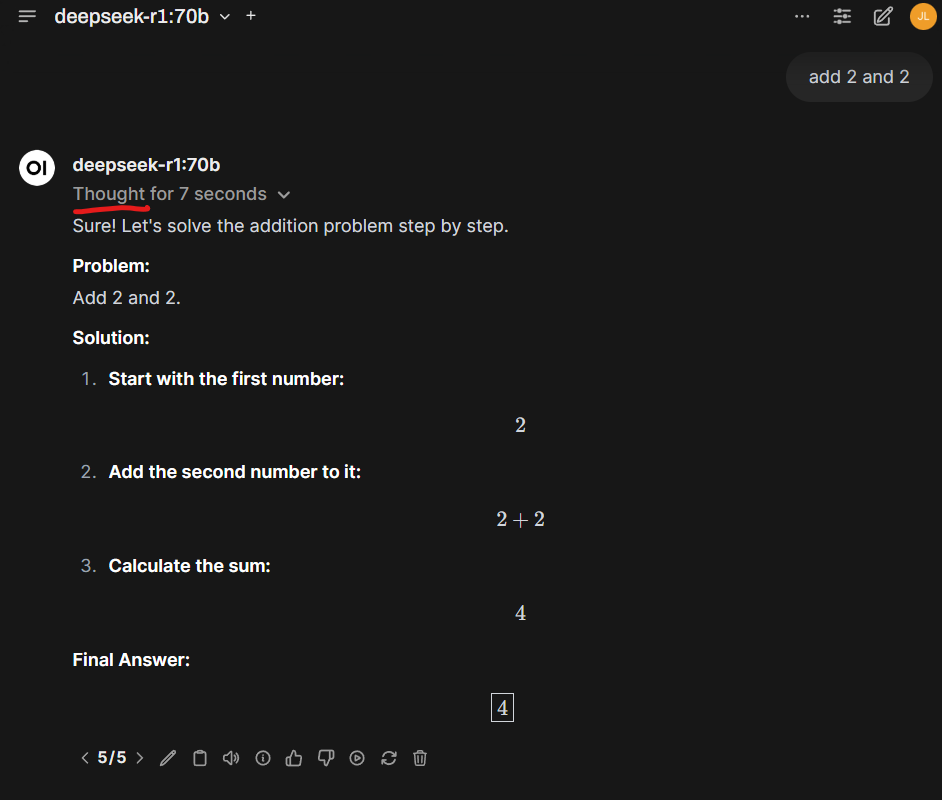
My system takes about 30 seconds to generate a response.
If you want DeepSeek writing code for you instead of just chatting, I've written that up: wiring DeepSeek into Claude Code and a local agent stack, and DeepSeek's own dsh coding agent, benchmarked.
Related: DeepSeek Everywhere: Claude Code and a Local Agent Stack · DeepSeek Harness (dsh): Install, Headless Runs, 3-Model Benchmark · What My AI Agents Actually Cost: DeepSeek vs the Big APIs · A Small Office of AI Agents on One Mini PC: My OpenClaw Stack · How to Have an LLM Adapt Any Project to Your System · Headless ComfyUI: Run It as a Service, Use It from Anywhere