WordPress to static site: the dead-simple kit, step by step
- Category
- Tools & Downloads
- Posted
- November 19, 2026
- By
- Jacob Lloyd — written with AI assistance, post-project
- Read time
- 26 min read
In plain terms: A WordPress site needs a database, plugins and constant updates. A static site is just a folder of web pages: faster, cheaper and nothing to patch. This guide moves a WordPress site to a static one in six steps, for people who are not developers. You download a free starter kit, export your site from WordPress, let an AI coding assistant do the conversion with ready-made scripts, look at the result on your own computer, and then put it online.
Your WordPress site works, but it needs a database, a stack of plugins and an update every few weeks, and its login page is a target for every password-guessing robot on the internet. A static site is the same pages saved as plain files: nothing to update, nothing to log in to, and it can be hosted for free. This guide moves your site across in six steps. You do not write code and you do not type commands: you download our free kit, export your site from WordPress, open the kit’s folder in the Claude desktop app, paste one prompt, look at the result, and publish it. We tested the kit end to end on 2026-11-19 with a real WordPress 7.1.5 site on Linux; the desktop-app, Windows, Mac and DreamHost steps follow the official guides, and the end of the article lists what we could not test. This kit grew out of rebuilding this website the same way by hand.
tl;dr
- What it is: a free kit (MIT-0) of templates, scripts and agent directions that turns a WordPress export into a static site that keeps every old address working.
- What it costs: the kit is free; the Claude desktop app needs a paid Claude plan (Pro is $20 a month, or $17 a month billed yearly); web hosting is whatever your host charges (this guide uses DreamHost shared hosting).
- What you need: your WordPress login and the Claude desktop app. The agent checks Python and downloads your pictures.
- Tested: WordPress 7.1.5, 63 automated tests, the preview driven in a real browser, and a fresh run by Claude Haiku 5.5 that used about 130k tokens.
The short version
| Step | What to do | You should see |
|---|---|---|
| 1. Get the kit | Download and unzip wordpress-to-static-kit-2026-11.zip | A folder with AGENTS.md and my-wordpress in it |
| 2. Export WordPress | yoursite.com/wp-admin → Tools > Export > All content > Download Export File; move the .xml into my-wordpress |
One .xml file in my-wordpress |
| 3. Open the folder | Claude desktop app → Code tab → Local → Open folder… → the folder that contains AGENTS.md |
A new session in that folder |
| 4. Paste the prompt | The prompt in step 4; answer its questions | “Open http://127.0.0.1:8000/ in your browser” |
| 5. Look | http://127.0.0.1:8000/ in your browser |
Your site, on your computer only |
| 6. Publish | Ask the agent for site-upload.zip; upload it to your web host (this guide walks through DreamHost) |
Your site live at your address |
What do you end up with?
A copy of your site that looks clean on a phone and a desktop, follows the visitor’s light or dark setting, and has a theme picker at the top. Every post and page sits at exactly the same web address it had on WordPress, so links from Google, social media and other sites keep working. Tables sort when you click a column heading. There is a search page, an RSS feed for readers and a sitemap for search engines. Nothing on the page loads from another company’s server: no trackers, no web fonts, no embedded players.


What a static site cannot do
A few WordPress things need a different answer:
- Contact forms become an email button (or a form service you choose).
- New comments are closed; old comments stay, as read-only text under each post.
- Search works inside the visitor’s browser instead of on a server.
- Shops, member areas and bookings (WooCommerce, membership plugins) do not convert. If your site depends on them, stay on WordPress or move those parts to a hosted service first.
Step 1: Download the kit
Download the WordPress to Static Kit (about 390 KB). The kit is the easy way: the exact parts (reading the export, fetching your pictures, redirects, the feed, the checks) are small scripts that behave the same every time, so the agent’s job is short and even a small, cheap model gets it right.
Unzip it:
- Windows: right-click the zip, choose Extract All…, then Extract. Windows makes a folder named after the zip, and the kit has its own folder inside, so you may see
wordpress-to-static-kit-2026-11\wordpress-to-static-kit. The one that matters is the folder that containsAGENTS.md. - Mac: double-click the zip.
Move that folder somewhere easy to find. On many Windows PCs the Documents folder is kept in OneDrive, which copies every file to the cloud; the kit works there, but a plain folder such as C:\Users\you\wp-kit keeps OneDrive from syncing every rebuild.

You should see: a folder with AGENTS.md, START-HERE.md, my-wordpress, tools and a few more. If not: you opened the outer folder; go one level in.
Inside: AGENTS.md, the directions your agent follows (never invent content, keep every post and every old address, no trackers); my-wordpress, where your export goes; tools, the converter, preview, checker and publish helper; and ThemeForge 2.0.1, our free theme with nine colour themes and a picker.
Step 2: Export your WordPress site
Your WordPress dashboard is at your site’s address plus /wp-admin, for example yoursite.com/wp-admin. Log in there as an Administrator.
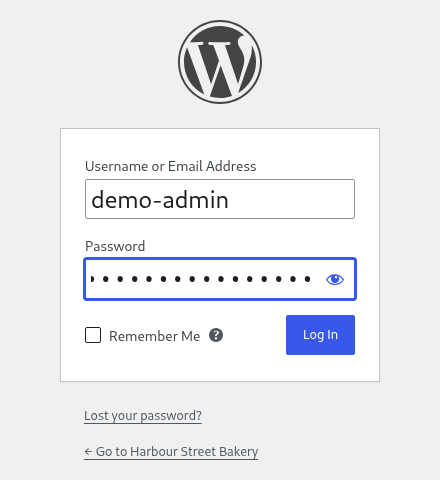

There are three ways to get your site out. Any of them works, and everything after this step is the same whichever you pick.
| What you need | What you get | Choose it when | |
|---|---|---|---|
| Way 1: one file | Nothing to install | Your words in one file; the kit downloads your pictures from your live site | Most sites. Start here. |
| Way 2: Whole Site Export plugin | Permission to upload a plugin | One zip with everything, pages exactly as WordPress shows them | Page-builder sites, or Way 1 could not download your pictures |
| Way 3: by hand | Your host’s control panel or FTP login | The export file plus your whole uploads folder | Plugins are not allowed, or the site is offline |
Way 1: export one file
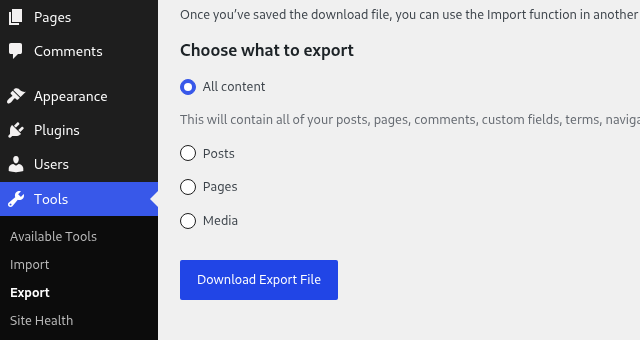
- In the menu on the left, point at Tools and click Export.
- Leave All content selected.
- Click Download Export File.
- Your browser saves a file whose name ends in
.xml, for exampleyoursite.WordPress.2026-11-19.xml, in your Downloads folder. Move it into the kit’smy-wordpressfolder.


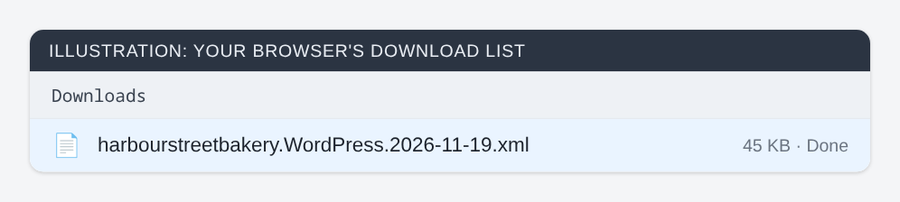

You should see: one .xml file in my-wordpress, a few kilobytes to a few megabytes (ours was 45 KB for eight posts and pages). If not: if the download is an empty page or an error, try again; if it fails twice, your host may be stopping long requests, so use Way 2.
That is all for Way 1. The export holds your words and a list of your pictures, not the pictures themselves. It also holds things your visitors never saw: drafts, private posts, the passwords of password-protected posts, and the email addresses of authors and commenters. Keep it to yourself, and keep it in my-wordpress while you may still rebuild the site (the agent needs it). Delete it after your final backup, once you will not rebuild again. The kit publishes only what was public. The kit downloads them from your live site during the build: one at a time with a short pause, only from your own site’s address, and it picks up where it stopped if you run it again. Anything it cannot fetch (a host that blocks downloads, members-only files) is listed in its report.
Way 2: the Whole Site Export plugin
Our free Whole Site Export by LaserLloyd plugin builds one zip with the export file, your whole uploads folder, every page as WordPress really shows it (page builders and shortcodes included), your menu and your settings. It changes none of your posts, pages or settings. While it works it keeps the zip in a temporary folder with a random name, placed outside the public web folder when your host allows it; downloading the zip or deactivating the plugin deletes it, and its daily clean-up removes any leftover within about two days. It is in the kit’s wordpress-plugin folder.
That zip is private data. It is a full WordPress export, so it holds your drafts and private posts, the passwords of any password-protected posts, and the email addresses of your authors and commenters. Keep it to yourself, and keep it in my-wordpress while you may still rebuild the site (the agent needs it). Delete it after your final backup, once you will not rebuild again. The conversion never publishes any of that: the kit builds only what was already public, so drafts, private posts and password-protected posts never reach the finished site (we test this, by both the one-file and the plugin route).
- In WordPress, go to Plugins > Add Plugin, click Upload Plugin, choose
whole-site-export.zipfrom the kit’swordpress-pluginfolder, and click Install Now, then Activate. - Go to Tools > Whole Site Export and click Export everything. Leave the two options unticked (one of them adds a database copy with your users’ password hashes, which you do not need). Keep the page open until it reaches 100%.
- Click Download the zip and move the zip into
my-wordpress. Leave it zipped. - Right after the download, deactivate and delete the plugin. That also deletes the copy of the zip on your server.
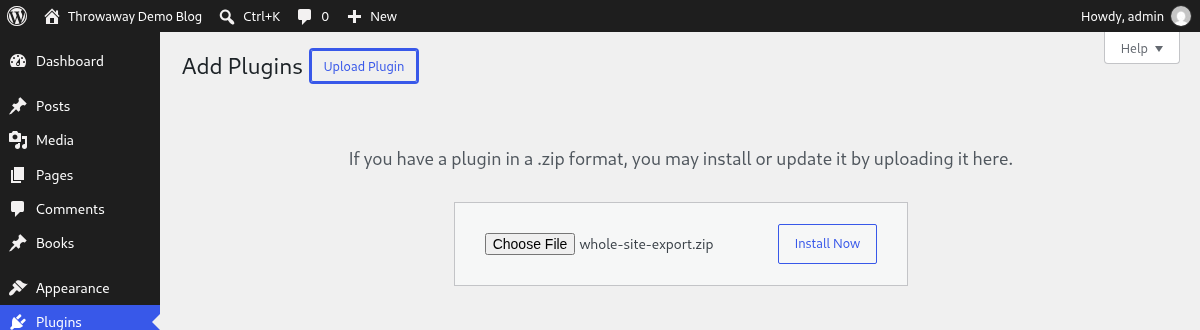
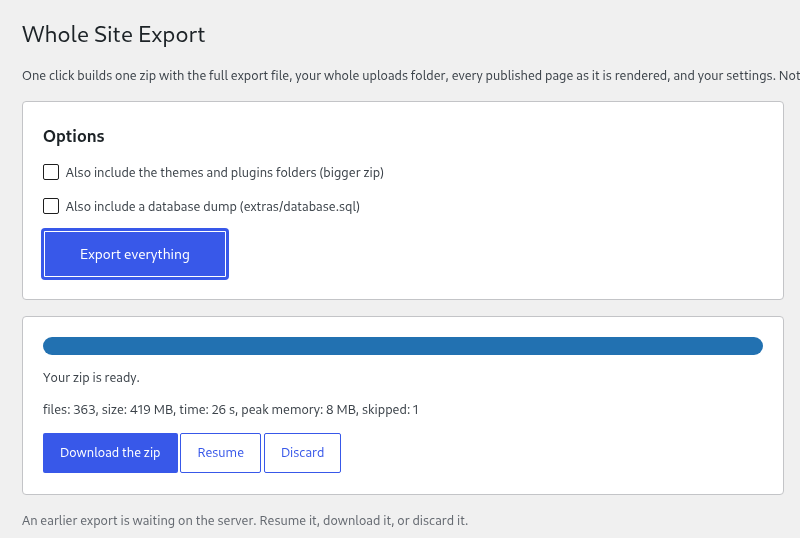
You should see: one .zip in my-wordpress. If not: if the page stops halfway, reload it and click Resume.
Way 3: by hand, with your host’s file manager
Do Way 1’s steps 1 to 4 first. Then copy your pictures, which live in a folder called wp-content/uploads on your web host:
- Log in to your hosting control panel (often cPanel) and open File Manager.
- Open
public_html(or the folder your WordPress lives in), thenwp-content. - Click the
uploadsfolder once to select it, choose Compress, pick Zip Archive, and confirm. - Select the new
uploads.zip, click Download, and move it intomy-wordpressnext to the.xml. No need to unzip it. - Delete
uploads.zipfrom the host again, so it is not left on your server.

With an FTP program such as FileZilla instead: connect with the login your host gives you and download the whole wp-content/uploads folder into my-wordpress.
You should see: the .xml and uploads.zip (or an uploads folder) side by side in my-wordpress. If not: if there is no uploads folder in wp-content, ask your host’s support where your WordPress files are.
On WordPress.com (not a self-hosted site), Way 1 works the same: Tools > Export in your dashboard.
Step 3: Open the folder in the Claude desktop app
An AI coding agent is a program that can read the files in a folder, run the kit’s scripts and change files, while you watch and approve. We recommend the Claude desktop app, which has Claude Code built in. It needs a paid Claude plan: Pro, Max, Ultra, Team or Enterprise (the free plan does not include Claude Code).
- Download the app from claude.com/download (macOS, Windows) and sign in.
- Click the Code tab at the top of the sidebar.
- In the environment selector, choose the top entry in the Local group (your own computer, not the cloud).
- Click the folder control, choose Open folder…, and pick the folder that contains
AGENTS.md.

These labels come from Anthropic’s desktop quickstart, which shows the real screens; the desktop app was not tested by us. You should see: a new session with your folder’s name. If not: check you chose Local, not a cloud environment, and the folder with AGENTS.md in it.
Claude Code may ask whether you trust the folder. In the terminal version the question reads “Quick safety check: Is this a project you created or one you trust?” and the choice you want is Yes, I trust this folder. You can trust this one: it holds only the kit and your own export.

Prefer a terminal? Install Claude Code with one line from the official setup page (curl -fsSL https://claude.ai/install.sh | bash on macOS and Linux, irm https://claude.ai/install.ps1 | iex in Windows PowerShell), open a terminal in the kit’s folder and type claude. If Windows says 'claude' is not recognized, Anthropic’s terminal guide gives the two-line PATH fix; then close PowerShell and open a new window. Git for Windows is optional. The Windows lines are not tested by us.
Any capable model will do; the kit was written so that a small one follows it. Compare models on the MakoBench board.
Step 4: Paste the prompt
Paste this into the session and press Enter (the “Copy this prompt” button on this page copies it for you):
Read AGENTS.md in this folder and follow it step by step. My WordPress export is in my-wordpress/. Ask me your questions before you build, never invent or rewrite my content, and stop when the preview is ready so I can look at it. Do not publish anything until I say so.
What to approve. The agent asks your permission before it runs a command (that is the app’s default “Manual” mode: “Claude asks before editing files or running commands”). The rule is simple: approve commands that start with python3 tools/ or py tools/ inside your kit folder. Anything else: say no and ask it why.
What happens next, in order:
- It runs
python3 tools/selftest.py, which checks Python and the kit and ends withReady.. - It finds your export and asks you its questions in one message: the web address your site will live at (the default is your current domain, which is what most people keep), the site name, colours, which pages go in the menu, the home page, whether to keep every old address (yes, unless you have a reason), your contact email, and whether to keep old comments and author names. Each has a default; “the defaults are fine” is a good answer, except for the email, which it needs.
- It builds the site. With Way 1 it downloads your pictures first, about a second each.
- It reads the conversion report with you: what was converted, what was left out (drafts, private posts), and anything that needs your decision.
- It runs the checker, starts the local preview and stops, waiting for you.


If Python is missing, the agent tells you. On Windows, install it from python.org/downloads, where it now comes as the Python install manager (also in the Microsoft Store), then close and reopen the app. On a Mac, a box may offer to install Apple’s command line developer tools; that is normal, click Install. (We followed the official pages; not tested by us.)
You should see: “Open http://127.0.0.1:8000/ in your browser.” If not: if the agent cannot find your export, check the file is directly inside my-wordpress, not in a folder inside it. If it asks something you do not understand, say so: its directions tell it to explain in plain words.
Step 5: Look at it on your computer
The agent leaves a small local test server running: a program that shows the site to your own browser only. Open http://127.0.0.1:8000/. Nobody else can see it; 127.0.0.1 always means “this computer”.


Look at these, and tell the agent anything you want changed:
- The home page and two or three posts. Are the dates, pictures and categories right?
- Your most important page (prices, opening hours, services).
- Any table: click a column heading. The rows sort; click again to reverse.
- The theme picker at the top right: try a light and a dark theme.
- Make the browser window narrow, like a phone. Nothing should need sideways scrolling.
- An old link: add
?p=and the number of one of your posts to the address (http://127.0.0.1:8000/?p=10). You should land on that post.
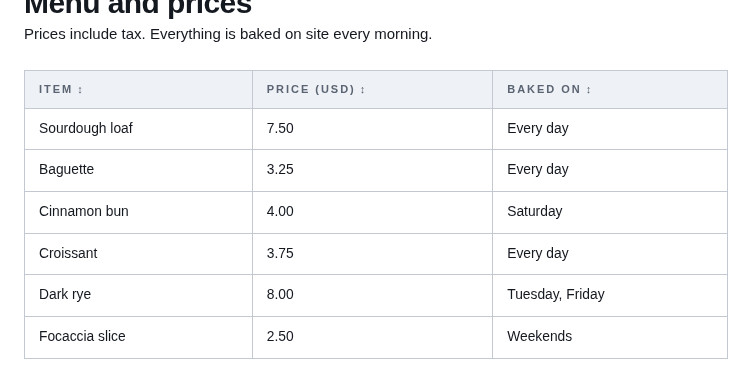
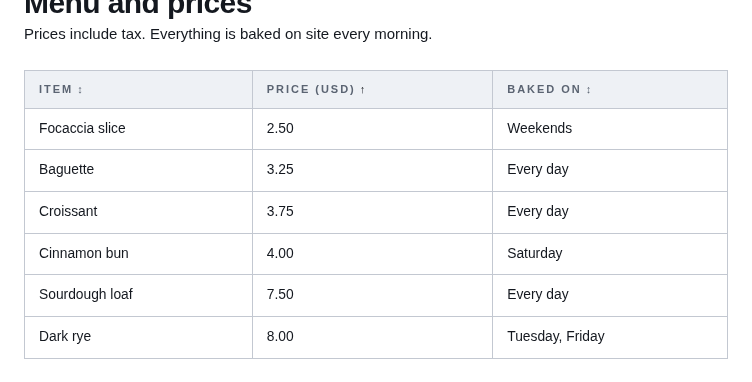
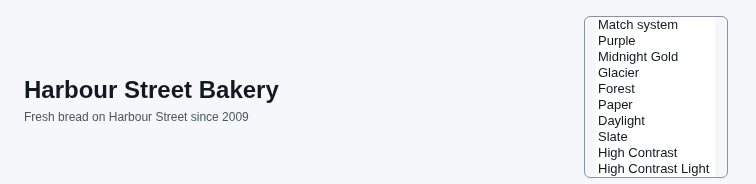

To change something, just ask: “start in the Paper theme”, “put our logo at the top”. You should see the change after the agent rebuilds and you reload the page. If not: reload with Ctrl+Shift+R (Cmd+Shift+R on a Mac).
Step 6: Put your site on a web host
Your new site is just the files in the site folder. Any web host that serves plain files will show it once you upload the contents of that folder, so the kit does not tie you to one company. The steps below use DreamHost shared hosting, which is what we publish laserlloyd.com to (over SFTP with an SSH key); your host’s screens will differ, but the shape is the same. Ask the agent for the upload zip first: “make the upload zip” writes site-upload.zip in your kit folder. The agent refuses to make it while the checker fails, for example while the contact email is still you@example.com.
What you need: a DreamHost account with a hosting plan, and your domain either registered at DreamHost or pointed to it.
If your WordPress is already on DreamHost (the common case)
Do not upload over your WordPress folder. Publish the static site into a new, empty folder, test it, then point the domain at the new folder, keeping the WordPress folder untouched as your way back:
- In your DreamHost panel, create the new folder (its File Manager, New Folder), for example
yoursite.com-static. - Upload your site’s files into it (the ways below). To look before you switch, DreamHost lets you add a free temporary
dreamhosters.comsite and upload the same files there to preview them (Previewing your site with a temporary domain). - When it is right, change the domain’s web directory to the new folder: Manage Websites → your site → Manage → Settings → Modify beside Directories (Changing the web directory assigned to a domain). The folder must already exist, and the name is case-sensitive.

The kit protects you here too: if you upload with the kit over SFTP (below), publish.py refuses by default to copy into a folder that still holds WordPress (it checks for wp-config.php). The file manager cannot check this, so when you use Upload Zip make sure you are inside the new folder, not the WordPress one.
If the domain is not set up on DreamHost yet
Add it first: Manage Websites → Add Website → Enter Domain Name, then Custom Setup; under Advanced Settings you set the web directory the files will live in (Adding a website and hosting). Allow about 15 minutes for it to appear.


Get your files up (easiest first)
Your web files live in the domain’s web directory (DreamHost names it after your domain, inside your account). If your WordPress is already on DreamHost, that directory still holds WordPress: in every route below, upload into the new folder you made above (for example yoursite.com-static), never the WordPress folder. Three ways to get the files up:
- DreamHost’s file manager (no extra program). Manage Websites → Manage → Content → File Manager, open the folder you are publishing into (the new
yoursite.com-staticfolder if WordPress is on this account, otherwise the domain’s web folder), click the Upload icon, choose Upload Zip, then Upload and Unzip (Using the website file manager). It unzips as it uploads. Uploads are capped at 1 GB; a larger site goes up by SFTP instead. - An SFTP program such as FileZilla. You need four things, all on the Content tab of Manage Websites: the server name, your username (under Show Login Info), its password (reset it there if you do not know it), and port 22 (FTP overview and credentials). Connect, then drag the contents of your
sitefolder into the folder you are publishing into: the newyoursite.com-staticfolder if WordPress is on this account, never the WordPress folder. - The kit over SFTP with an SSH key (for the comfortable): see the advanced note below.


Turn on the free HTTPS lock
Manage Websites → Manage → Security, then Add Certificate next to Let’s Encrypt SSL Certificate (Adding a free Let’s Encrypt certificate). The domain’s DNS must already point to DreamHost, it takes 5 to 10 minutes, and it renews itself. Order matters. DreamHost’s help says the certificate can fail to install while an .htaccess file with redirect rules is present, and the kit ships exactly such a file. So: if your domain already loads over https:// on DreamHost, it already has this certificate and there is nothing to do. If it is a brand-new domain here, add the certificate before you upload the kit’s files, while the web folder still has no .htaccess in it. If you must add it to a folder that already holds an .htaccess, rename that file to .htaccess_OFF in the file manager first, add the certificate, then rename it back.

Old links on DreamHost
DreamHost shared hosting runs Apache, so the kit’s .htaccess file is what makes your old /?p= and /?s= links keep working there. Keep it in the uploaded folder. (We did not test this on a live DreamHost site; it is tested against a stand-in server.)
You should see: after you switch the web directory (or upload to a fresh domain) and the certificate is on, your site at https://yoursite.com, with your pictures. If not: give DreamHost up to a few hours after a DNS or certificate change, and check the files landed in the web directory, not the home folder above it.
Keep WordPress running until the new site works and you have checked it.
Your own domain’s address book (DNS)
If your domain is registered somewhere other than DreamHost, you point it at DreamHost by changing its nameservers at your registrar (the company you bought the domain from) to ns1.dreamhost.com, ns2.dreamhost.com and ns3.dreamhost.com (Nameservers overview). Changes take 4 to 72 hours.
One warning before you touch it: nameservers decide where all of your domain’s records live, including email. If you move them to DreamHost, your email (its MX records) moves too, and mail can stop arriving unless those records are set up at DreamHost first. If your email runs through your current provider, set up the matching records at DreamHost before you switch, or ask your email provider’s and DreamHost’s support to make the change with your mail kept working.
Advanced: let the kit upload over SSH
If you are comfortable with an SSH key, the kit can copy the site straight to DreamHost without typing a password. Do this only after a full backup at your host. DreamHost’s own guide sets up a key (passwordless login); the user must have Shell (SSH) access turned on, not SFTP only. Then the agent runs publish.py sftp and shows you a plan first. The guards:
- Nothing is uploaded without your yes.
- The first upload goes to a
static-testsubfolder, so nothing your visitors see changes. Use it to check that every file arrived. The pages will not look right from there, because their links are written for the top of the site; to see the site properly before the switch, use DreamHost’s temporary domain (above). - A folder that still holds WordPress (
wp-config.php) is refused unless you ask for it by name. - An existing
.htaccessis renamed with the date, never overwritten. Nothing is deleted.
You should see the plan, with the file count and the static-test folder. If not: if it says it could not log in without a password, the key is not set up yet, so use the file manager or FileZilla way above.
After you publish
Check old links. Open three old addresses on the live site: a post, a page, and /?p= with a post number. Each should land on the right page. Old search links (/?s=word) land on the new search page.
Forms. The kit replaced your contact form with an email button. If you want a real form back, the agent can add a form service (the kit’s extras/contact-form-services.md explains the privacy trade).
New posts. Ask the agent “add a new post called … with this text”, then make the zip and upload it to your host again.
When to switch WordPress off. Wait until the new site has been live on your domain for a couple of weeks and your old links work. Then take a full backup at your host, keep your my-wordpress folder, and only then cancel the WordPress hosting. Keep the backup somewhere other than the host.
What it costs
- The kit: free (MIT-0: use it for anything, no credit needed).
- The AI agent: a paid Claude plan; Pro is $20 a month, or $17 a month billed yearly. A small site used about 130k tokens in our fresh run with Claude Haiku 5.5. At Anthropic’s API prices that is about 1 to 7 US cents with Haiku 5.5 ($0.10 per million input tokens, $0.50 per million output), or about $1 to $5 with the top model, Claude Fable 5.2 ($8 and $40); on a Pro plan it comes out of your plan’s usage.
- Hosting: whatever your web host charges. This guide uses DreamHost shared hosting; many hosts have a plan of a few dollars a month, and some offer a free tier for a small static site.
Do you need the kit at all?
No. A capable agent can convert a WordPress export without it: tell it what you want and point it at the .xml. What the kit adds is predictability: the same redirects, checks, theme and reports every time, so a cheap model gets it right and you know what to look at.
For the curious: our trial, versions, and cheaper setups
What went wrong in our trial, and what the kit does about it
We built a real WordPress 7.1.5 site in a throwaway container (four posts, four pages, a draft, nested categories, a block gallery, an old-style [gallery] shortcode, a captioned picture, two tables, a YouTube embed, a Contact Form 7 shortcode and a comment), exported it through the screens above, and followed the kit's directions in a fresh folder.
| What happened | Why | What the kit does |
|---|---|---|
| Posts pointed at picture sizes a media download did not include | WordPress makes smaller copies (-1024x683.jpg) and posts link to them | Downloads every size a post uses; if one is gone, uses the original and says so in the report |
A contact form would have shown as [contact-form-7 id="123" …] text | Shortcodes need the plugin that made them | Replaces known form shortcodes with an email section and reports any other shortcode by name |
| The YouTube video would have loaded Google's player and its cookies | An embed is a page from another site | Turns embeds into a plain "Open this on youtube.com" link |
| On WordPress's public test data, links pointed at a post with the wrong date and at picture pages | Old content keeps links WordPress quietly fixed at view time | Guesses the post from the address and sends picture pages to the picture, both listed in the report |
| Cover blocks kept their background pictures on the old site | The picture address sits in a style attribute, not an <img> | Downloads and rewrites those too; the checker flags anything still loading from elsewhere |
A review found the first draft let you publish with a test address or you@example.com still on every page | The checker only looked at links | The checker and the publish helper now refuse a missing, local, http:// or staging address and the placeholder email |
| Our fresh run with Claude Haiku 5.5 found the self-test wrote scratch files outside the folder and printed a fake "Uploading" line | Test output leaked to the screen | The self-test keeps its files inside the kit, deletes them, and prints one line |
We also ran the converter on WordPress's own theme unit test data (55 posts, 21 pages, 36 media files): it built cleanly, and the checker flagged one item for a human, an audio file hosted on another site.
The fresh run. We gave Claude Haiku 5.5 only the kit, our export file and the prompt above, with canned answers to its questions. It ran the self-test, downloaded 11 pictures from the test site, built 4 posts and 4 pages, read the report, stopped at the preview, and pointed out a hello@example.com in our sample contact page that it left alone because it is the site owner's text. It took 15 tool calls, about 65 seconds and 130,128 tokens. An earlier reviewer's run of the same kind took 19 tool calls, 83 seconds and about 131k tokens.
Versions we tested, and what we did not test
Tested on 2026-11-19 on Linux: WordPress 7.1.5 (PHP 8.3.36, MariaDB 11.8.8, in podman), Python 3.14.10 (the kit's 63 tests also pass on Python 3.9), headless Chrome for Testing 151, ThemeForge 2.0.1, Claude Code 2.1.326 for the folder-trust wording. In the browser we checked eleven pages, sorting by mouse and keyboard, the theme picker in light, dark and "match system" modes, five pages at 360 pixels wide, six kinds of old WordPress links including /?s= search, and that no request left the site.
Not tested by us: the Claude desktop app, Windows and macOS (Python and Claude Code installers; we followed the official pages), the DreamHost control panel (the DreamHost pictures are diagrams drawn from DreamHost’s help pages, not captures of a live account), a live SFTP host (the plan, the WordPress refusal and the .htaccess backup were tested with a stand-in for the server), real .htaccess redirects on Apache, and DNS changes.
Cheaper setups, and what you give up
A model is the AI that does the thinking; a harness is the program that lets it work in your folder (the Claude desktop app is both). The kit is built so a smaller model can follow it, because the scripts do the precise work.
| Option | What it costs | What you give up |
|---|---|---|
| Claude Haiku 5.5 inside Claude Code (16.9 on MakoBench) | Uses less of your Claude plan | Less reliable when something unusual turns up |
| OpenCode (free, open source) with a low-cost model such as DeepSeek V4.1 Flash (19.2 on MakoBench) | You pay the model provider per use | More setup: an account and an API key, and a terminal |
| A local model on your own graphics card | Free after the hardware | The best local model on our board scores 16.9 against 25.2 for Claude Fable 5.2; you need a strong GPU and patience |
Scores from the MakoBench board on 2026-11-19, where the top row is GPT-6.2 Astra at 25.4 and gaps of a point or two are ties.
References
All checked on 2026-11-19.
- WordPress, Tools Export Screen and First steps (the
/wp-adminaddress); WordPress.com, Export your content - cPanel, File Manager (Compress, Download)
- Anthropic, desktop quickstart, desktop app, Claude Code setup, terminal guide, API pricing, Claude plans
- Python, downloads and using Python on Windows
- Microsoft, Zip and unzip files and Back up your folders with OneDrive
- DreamHost help (checked 2026-11-19): Adding a website and hosting, Changing the web directory, Website file manager, FTP overview and credentials, Free Let’s Encrypt certificate, Nameservers overview, Preview with a temporary domain, Passwordless SSH login
- OpenSSH, sftp manual (batch mode needs non-interactive login)
- MakoBench, our model leaderboard (scores quoted as shown on 2026-11-19)
Related: How we moved this site off WordPress with Claude Code · ThemeForge, the drop-in theme the kit uses · MakoBench, the model board
Downloads
Free for personal use. If it saves you an afternoon, the coffee button's nearby.